使用jQuery、CSS3自定义文件输入框(File Input)
作者:admin 时间:2021-9-8 15:40:37 浏览:我们都知道文件输入框(File Input)在自定义方面非常有限,本教程将指导你完成构建 jQuery 插件的过程,使用jQuery、CSS3自定义文件输入框(File Input)。
自定义控件介绍
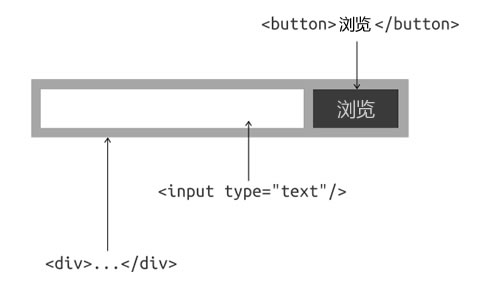
要构建自定义替换,我们需要一个简单的标记结构:
单击“浏览”按钮将在原始文件输入上触发“单击”事件。选择文件后,原始输入会触发“更改”事件,我们将通过访问原始值来设置输入的值。
实现方法
html
我们打开一个 HTML 文件并添加一个容器和一个带有标签的文件输入框(File Input):
<div class="customfile-container">

  <label>文件: </label>

  <input type="file" id="file" name="myfiles[]" multiple />

</div>
还要确保给它一个id和一个数组名称,这样myfiles[]服务器就可以检索所有带有 IE 回退的文件名。
jQuery
接下来构建一个基本的 jQuery 代码结构:
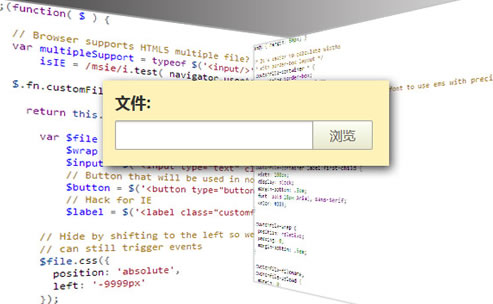
;(function( $ ) {

  $.fn.customFile = function() {

    return this.each(function() {

      var $file = $(this).addClass('customfile'); // the original file input

      // code here

    });

  };

}( jQuery ));
最后,在标记中调用函数:
<script>$('input[type=file]').customFile()</script>现在让我们创建替换所需的元素。IE浏览器是防止当输入被触发外部,所以我们将使用一个被检索的文件名严格的安全措施label的替代button。通过触发标签上的事件,我们可以解决这个问题。
var $wrap = $('<div class="customfile-wrap">'),
    $input = $('<input type="text" class="customfile-filename" />'),
    $button = $('<button type="button" class="customfile-upload">浏览</button>');
$label = $('<label class="customfile-upload" for="'+ $file[0].id +'">浏览</label>');type="button"需要该属性以保持一致性,以防止某些浏览器提交表单。
接下来,让我们“摆脱”原始输入。与其隐藏它,不如让我们通过将它向左移动来从视口中移除它,这样即使它不可见,我们仍然可以使用它;如果输入实际上是隐藏的,这对于触发可能有问题的事件很有用。
$file.css({
  position: 'absolute',
  left: '-9999px'
});
最后,让我们将新元素附加到 DOM:
$wrap.insertAfter( $file ).append( $file, $input, ( isIE ? $label : $button ) );
自定义CSS外观
现在让我们为它添加一些样式:
.customfile-container * {
  box-sizing:border-box;
  -moz-box-sizing:border-box;
  -webkit-box-sizing:border-box;
  font: normal 15px 微软雅黑;
}

.customfile-container {
  width: 300px;
  background: #FFF2B8;
  padding: 1em;
  margin: 0 auto;
}

.customfile-container label:first-child {
  width: 100px;
  display: block;
  margin-bottom: .5em;
  font: bold 18px Arial, sans-serif;
  color: #333;
}

.customfile-wrap {
  position: relative;
  padding: 0;
  margin-bottom: .5em;
}

.customfile-filename,
.customfile-upload {
  margin: 0;
  padding: 0;
}

.customfile-filename {
  width: 230px;
  padding: .4em .5em;
  border: 1px solid #A8A49D;
  border-radius: 2px 0 0 2px;
  box-shadow: inset 0 1px 2px rgba(0,0,0,.2);
}
.customfile-filename:focus {
  outline: none;
}
.customfile-upload:hover {
  background: #fafafa;
  box-shadow: 0 0 2px rgba(0,0,0,.2);
}
至此,你应该在浏览器中看到这样的结果。
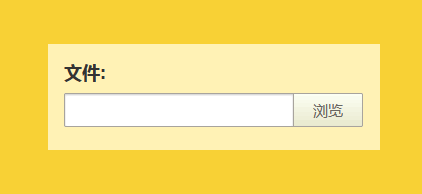
继续并自定义 CSS 以创建你自己的外观。
您可能对以下文章也感兴趣
标签: File-Input 上传文件 文件上传按钮
相关文章
x